Saturday, July 30, 2011

Weeding

Yesterday, the back parking pad looked like this:
IMG_4906

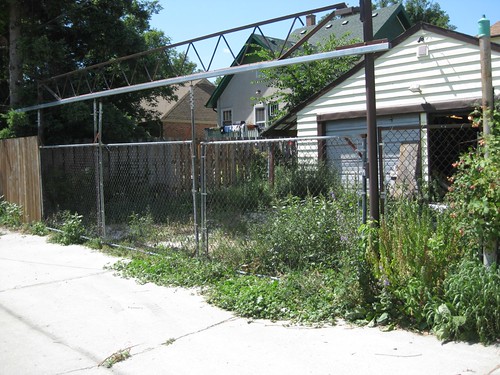
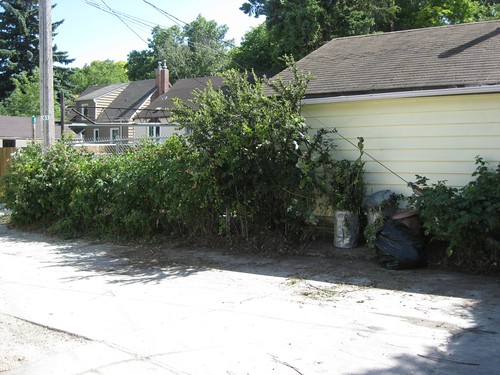
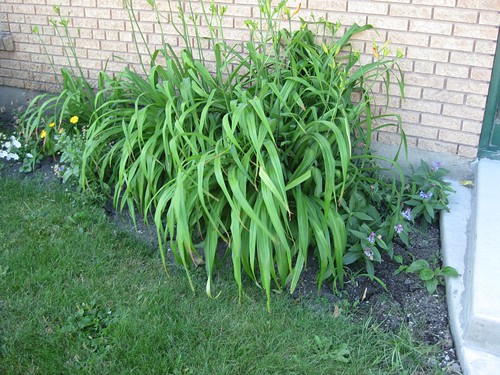
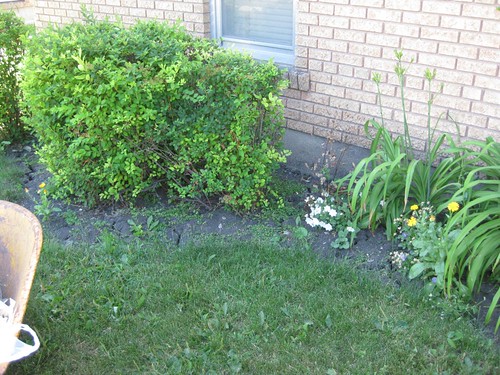
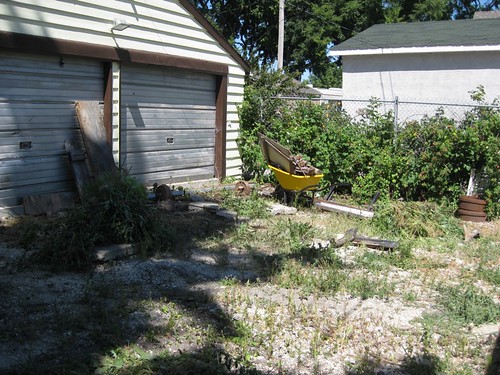
Today we weeded some more, as you may be able to tell from the many piles of green stuff:
IMG_4911
(I count six piles in this photo.)

IMG_4912
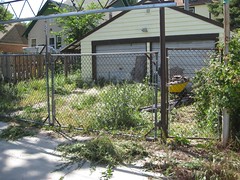
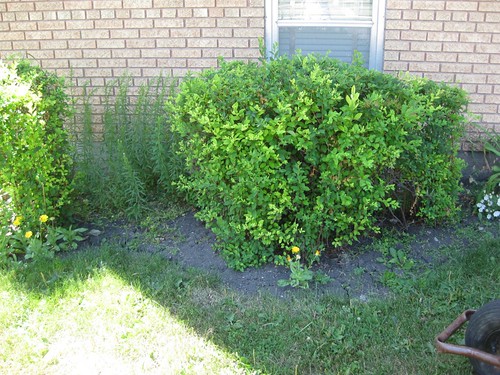
(Two or three more piles in this photo.)

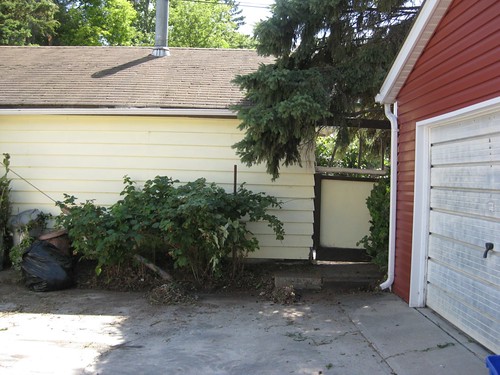
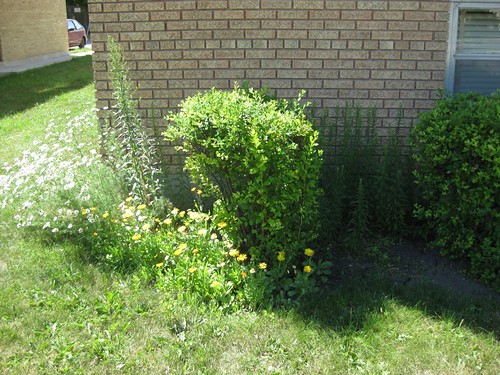
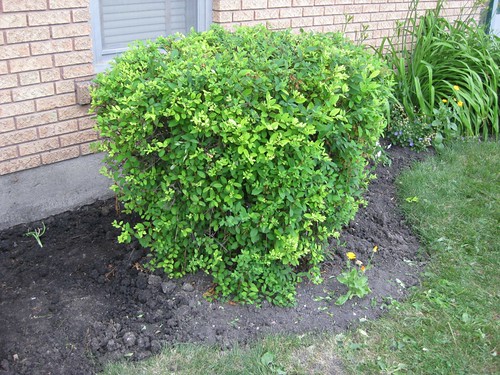
The parking pad from the same angle as the first photo:
IMG_4913
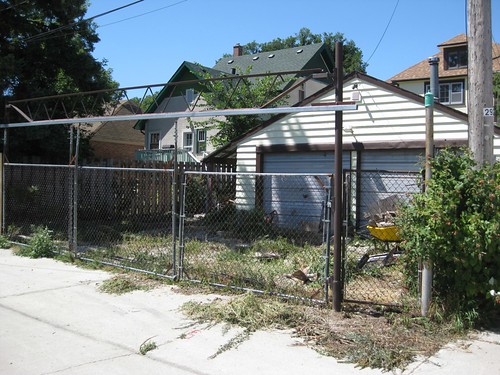
(I kicked the weeds in the back lane into a tidier pile after taking the photo.)

I also did some weeding in the back yard under the spruce tree, and pruned some of the branches that were hanging low over the gate.

On my way back home, I remembered to drop off something at my mom's... which meant I ended up walking past their boulevard trees, which needed some pruning. I had clippers in my bag. I trimmed the water-shoots from the base of the trees, plus low hanging branches and branches over the walk and street.

While stuffing my mom's trimmings into two *full* garbage cans, the neighbour came out with his adorable puppy, so I went over to pet him. (The puppy, not the neighbour. The neighbour has a girlfriend.) I commented that he had some Manitoba maples and elm trees growing in his garden next to the house, and that he should remove them. (This is their first summer in the house... the previous owner was 96 before he passed, and wasn't quite up to the yard work the way he used to be.) Since I had my clippers (and now a pruning saw... there was a thick branch or two that needed removing at mom's) out, I offered to cut them at ground level, and he could dig up the roots later. I also hacked the several-meter-tall elm tree into three pieces for easier disposal.

I eventually did make it home, and had a nice, cool shower, followed by a nap. :)

I still have a heat-headache, though. (It started yesterday.) No matter how much I drink (and I do guzzle the water while working outdoors), I still get those. :(

Friday, July 29, 2011

Whoops!

Heh... looks like I sat on a raspberry on one of my breaks:
IMG_4909

It's funny how raspberry stains react to soap... it immediately changes to blue-black. Here's the stain after attacking it a bit with soap during my shower:
IMG_4910
Homemade litmus strips, anyone? (I wonder if it would change back if I poured a little vinegar on it?)

I put a bit of laundry detergent on it, so hopefully the rest of the stain will come out in the wash tomorrow.

Gardening

Today I went over and helped garden at my(?) dad's(?) old house.

I took a "before" photo of the place that I thought I would be weeding:
IMG_4901

Since it's hard to get in and out of that gate, I went around to the side gate.

There are raspberries by the side gate. (By the gate in the photo too, but my favourite ones are by the side gate.)

So I started munching raspberries. However, there were some prickly weeds making it hard to get the as-yet-unpicked raspberries, so I donned gloves, and started pulling those weeds. Then I got out the pruning shears, and pruned some volunteer trees that we didn't want, but were too big to pull up by the roots. Then I tied up some raspberries that needed tying up. Then I pruned a shrub that was crowding out the garbage area and encroaching on the back lane. Then I started shovelling up the dirt and debris that was encroaching on the back lane. (I also pulled a few weeds in the back pad when I went to get the shovel.)

Somehow, my raspberry munching turned into full-out gardening. However, that area now looks worlds better than it has in years:
IMG_4902
IMG_4903
You'll have to take my word for it, because I didn't take any "before" photos of this spot. Whoops. Oh well. You can partially tell how much we did from the trash cans: those were all completely empty when we started (today was trash day). Yes, there are two piles of debris that still need disposing of, but the trash cans were already full, and dad only had the one garbage bag.

Dad pulled some of the weeds that were in the area in the second photo, plus some weeds in the back parking pad, plus (I think) moved some junk in the back parking pad. Dad's wife picked raspberries and cherries for jam making. (And ate some too, of course.)

I borrowed my mom's step ladder, and picked the high cherries. (My dad's wife's back is sore right now.) Plus I pulled a couple weeds in the front garden. (No photos of either of these.)

So, the back parking pad is slightly better, but still needs a lot of weeding:
IMG_4906
Guess what I'm doing tomorrow? We're going to start earlier, though, so that it's not so crazy-hot. (The back parking pad, as you can see, is a rather sunny spot. The raspberries, while partially shaded, didn't have the shade extending very far, and so most of the time was in the sun too.)

For easier comparison, here's the back pad, before & after, side by side:
IMG_4901 IMG_4906

Tuesday, July 26, 2011

Bumblebees

Sunday after family dinner, Uncle B and I went for a bike ride. (Yay bike ride! We rode to the Forks to watch the salsa dancers. Bonus: I didn't fall off!) Afterward I stopped by my dad's for some raspberries. Mmmmm! There were a bunch of bumblebees, both on the raspberries, and on the weeds.

I caught this little fellow napping:
IMG_4897
Where are your pollen sacs, little guy? Your orange bum stripe sure is pretty!

However, most were busy working despite the late hour and cooling temperatures, like this guy:
IMG_4900
(Anyone know what that weed is? The flower part is stiff-spikey. I haven't tried looking it up yet.)

Monday, July 25, 2011

A Chip Off The Old Block

I wasn't very good about taking progress photos at the wood block printing workshop. However, when I finished up on Friday, I took *tons* of photos! This is my post about Friday's marathon session.

I arrived at the art club around 11:30, looked at mats (for something else) for a few minutes, then worked on my block printing until leaving at 7:50! Ouch! Except for a few people saying hi, I was all alone. However, that meant I could spread out as much as I wanted:
IMG_4857

When I posted about the wood block printing progress last, my block looked like this:
IMG_4843

That block produced an image that looked like this on the artist proof:
IMG_4860
(It turns out the paper I used for the artist proof behaved a bit differently than the other paper I had. More on this later.) This first colour was printed Thursday, but I didn't photograph it until Friday.

It's hard to see with the flash, but, in that first photo of the wood block, there are a bunch of pencil lines marking all the detail for the bird at all of its stages. However, it turns out that pencil washes off wood. After printing the first colour Thursday night, my block was washed clean:
IMG_4853

Friday morning, I got to draw the detail back on:
IMG_4855
I didn't put as much detail on, since I knew it was just going to wash off again. I put on enough for this stage of the carving, and to make sure later details would fit.

Then I used my knife to make a V groove beside the lines that marked a boundary between what was going to be printed next, and what had been printed previously:
IMG_4856

I was worried about over-shooting with my gouge (since I was using a cheap lino-cutting tool on Friday, rather than my friend's nice, expensive, "cuts like a knife through butter" gouges), so I put a second V groove line in, to act as a bumper:
IMG_4858

Then I got to work with my gouge:
IMG_4859

Because the areas that would be different colours were separated, I could do two at once with this block:
IMG_4861

Next step, drawing the bark:
IMG_4864
(Note to self: Bark takes a *long* time to carve!!!)

Here's the bark and next level of detail on the bird:
IMG_4865
(This was obviously taken *after* I started printing the next two colours.)

The final product that the block produced:
IMG_4866
(It's a nuthatch.)

I printed an artist's proof, plus five prints, for a total of six:
IMG_4867

Here's a comparison of how the two different papers behaved:
IMG_4868
We're getting together with the instructor again on Thursday, to show her our finished prints. I'll have to ask her why she thinks the AP paper behaved so differently. (It was some older paper that had started to yellow, but it should have been the same stuff.) Weird.

I need to decide which print I'm going to keep for myself, and which I'm going to put for sale in the next art show. (I think the wood block looks rather neat itself, and so am thinking of hanging it in the show too... both to illustrate how the print was made, and in case anyone wants to buy it!) I've narrowed it down to either the AP, or print 5/5.

It was a *long* day, but I'm glad I got my prints done!

PS: It's still healing, but my finger is feeling much better now.

Sunday, July 24, 2011

Saturday Gardening

It's been a while since I've had a chance to do some gardening, and the garden was showing it.

Before:
IMG_4877
IMG_4878
IMG_4879
(Those tall things in the back are weeds. I thought they probably were, but I was letting them grow for a bit to be sure... plus I didn't really have a chance to deal with them before.)
IMG_4880

These cracks looked a good six inches deep:
IMG_4882
The ground was *dry* and rock hard. I really need to dig in some organic matter. I need to ask my landlord for some more peat moss, since he took the last stuff. (He thought I didn't want it... it was just that the ground was so wet that summer, I never had a chance to use it!)

After:
IMG_4888
IMG_4889
(I didn't notice this photo was out of focus yesterday, I was trying to be quick as it was starting to rain.)

I put some of the grass I dug up along the new sidewalk, because the concrete people didn't fill back up to the same level. (They made it look they did, but they didn't compress the soil at all.)

My apartment's caretaker was out helping too:
IMG_4885

Venus Fly Trap

I am happy to report that my venus fly trap is distinctly *not* dead yet.
IMG_4893
(That dead looking bit is the flowers from a while ago... they're supposed to die back.) It's blooming again. It seems determined to bloom, so I'm letting it.

It survived a dry Winnipeg winter outside of any protective enclosure, and then another dry period where I ran two window air conditioners 24/7. (The weather has gotten much nicer now, and so the A/C is off, and the windows are open. It's a little warm today, but *so* much better than Wednesday.)

Even though I was still wilting in the heat myself, it was amusing to hear all the dire heat warnings on the news for what is relatively normal summer weather in NC. ;)

Saturday, July 23, 2011

*Screech* *Pop*, *Screech* *Pop*!

Subtitle: Why you should obey the speed limit, and keep sufficient distance (2-3 seconds) between you and the car in front of you.

Three-car pile-up on my street:
IMG_4869
(I suspect someone ahead of them was turning left onto the side street... which happens often, but people don't expect for some reason.)

How handy! There was an undercover cop car sitting there:
IMG_4871
(Guy in the middle is a cop, in case it's hard to see the details.)

Whoa, *three* cops! They must have been getting ready to do a safety check, rather than a speed trap:
IMG_4874
Also handy: the truck that started leaking fluid all over the street also happened to be towing a trailer of sand (some of which spilled on impact). Plus he had a shovel! Cop was clever enough to use sand to absorb fluid. I'm not sure why he didn't put some more under the front of the truck so that the continuing leak didn't get into the sewer system... unless the sand is to prevent the street from getting slippery? I always thought it was for environmental reasons.

Additional tip: if you're towing a trailer of sand, allow for even more distance in front of you, because the additional weight will take more time to stop.

Update: Truck guy shovelled more sand to absorb stuff under truck. He's waiting for a tow (driving while fluids leaking out probably a recipe for damage to engine), and everyone else has left.

Thursday, July 21, 2011

Making Sawdust

After the block printing workshop tonight (no new scraped knuckles, yay!) I went over to mom's garage to play with the power tools. I transformed two scraps of wood into a hockey puck with a handle:
IMG_4847
IMG_4848
IMG_4849
IMG_4850
Tools used: radial arm saw, band saw, drill press, belt sander.

This gadget I created is for block printing. You use it to rub the back of the paper, so that it absorbs the print. The teacher said we could buy a real one, or use the back of a wooden spoon. I brought a wooden spoon, but it didn't work as well as the gadget another student made. So I made my own. (Apparently the art supply store that was supposed to order the gadgets in hasn't received them yet. I was being cheap... I've already spent tons on this class.)

The real gadgets are larger, thinner, and covered in a banana leaf that is twisted around back to make a handle. The other student's gadget was larger, and with a different style handle. My gadget size was limited by the selection of wood in the scrap bin. (I didn't dig very deep either.) Although mine is smaller, it's larger than the back of a wooden spoon. I think it will be fine.

Note: the correct name for the gadget is a baren. (According to that site I link to, what I thought was a banana leaf is actually the sheath from a stem of bamboo.)

Ow: The Morning After

IMG_4846
Isn't it amazing how something so small can hurt so much?

Knuckle scrapes always hurt, because you're constantly stretching the wound when you bend your finger. This one hurts more than the standard knuckle scrape... it appears I've also bruised the knuckle, so it's also tender and swollen. Thus, in addition to stretching the wound, I'm also compressing the bruise every time I bend my finger. It feels like it does when my arthritis is acting up.

My finger is angry. In short, my finger is giving me the finger.

And Now To Bed

IMG_4843
Homework done, I can now go to sleep. (Yeah, so not going to finish this tomorrow evening. I think I can finish it up at home on Friday, though.)

Wednesday, July 20, 2011

Ow.

I'm taking a class on wood block printing. I haven't cut myself with the knife or the gouge. Did you know wood is sharp too?
IMG_4842
The gouge slipped, and my knuckle met the edge of the board with great force. Luckily I had a bandaid with me.

Note to self: put more bandaids in emergency pack.

Tuesday, July 19, 2011

Curses!

Why does glass have to be so dang fragile?
IMG_4835
The handle knocked against the side of the sink while I was washing it.

Is there any way to repair glass? (So that it's water tight, and won't explode?) Would heating it with a propane torch do it, or would that just cause it to explode? *sigh*

I loved that pitcher. It had a lip that didn't dribble, and was the perfect size for frozen juice.

Update: Hmmm found the following on a forum:
I have a slightly unorthodox one for you.

Get a blowtorch. Melt the glass at the crack. However, to avoid shattering it completely, you'll have to heat the entire thing up first - a LOT. Put it in a cold oven and load the oven up with bricks around it to hold heat. Bring the oven up to 500 degrees and keep it there for a good hour to ensure all the bricks are GOOD and HOT.

Then open the oven and, wearing 2 or 3 heavy mitts, grab the glass and using the blowtorch, melt the crack with high intense heat just on that spot. Work quickly so it doesn't cool down too fast.

Then put it back in the oven, leave the oven on 500 for another 20 minutes, then turn off the oven and LEAVE IT CLOSED overnight.

I have no idea at ALL if this will actually work - but from what I remember about glass blowing (my whole 4 hours of it), this might just do the trick. The blowtorch will work - it's the whole heating and cooling bit I'm worried about...

I have bricks and an oven, and I can borrow the blowtorch. (I think I'll leave it in the oven while I torch the side, though... as long as heating from only one side is fine. Of course, I'm not sure I'd be able to get the right angle inside anyway.) I'm not sure this is the right project for the heatwave though... perhaps I'll wait for a cooler day.

Comments? Suggestions? Warnings?

Sunday, July 17, 2011

The Evil Plastic Coil Zipper

Four down, more to go. A particularly evil unravelling zipper:
IMG_4830

Two Birds, One Stone

IMG_4829
My lingerie bags have been snagging things with their unravelling zipper ends. One of my tank tops had a tag that was irritating me. Tag cut off tank top, cut in half, then used to sew up the ends of a zipper. Two problems solved. :) (The nice thing about the tag is that I don't have to worry about the sides fraying.)

Now to find more tags to cut off for the rest of the lingerie bags. (Either that, or do a bit more folding for each zipper end.)